In this tutorial you will learn how to create tissue paper fans in 10 steps. Paper fans are a very easy way to decorate your special events, you can choose use them as backdrops for photo booths and dessert tables or hang them from the ceiling.
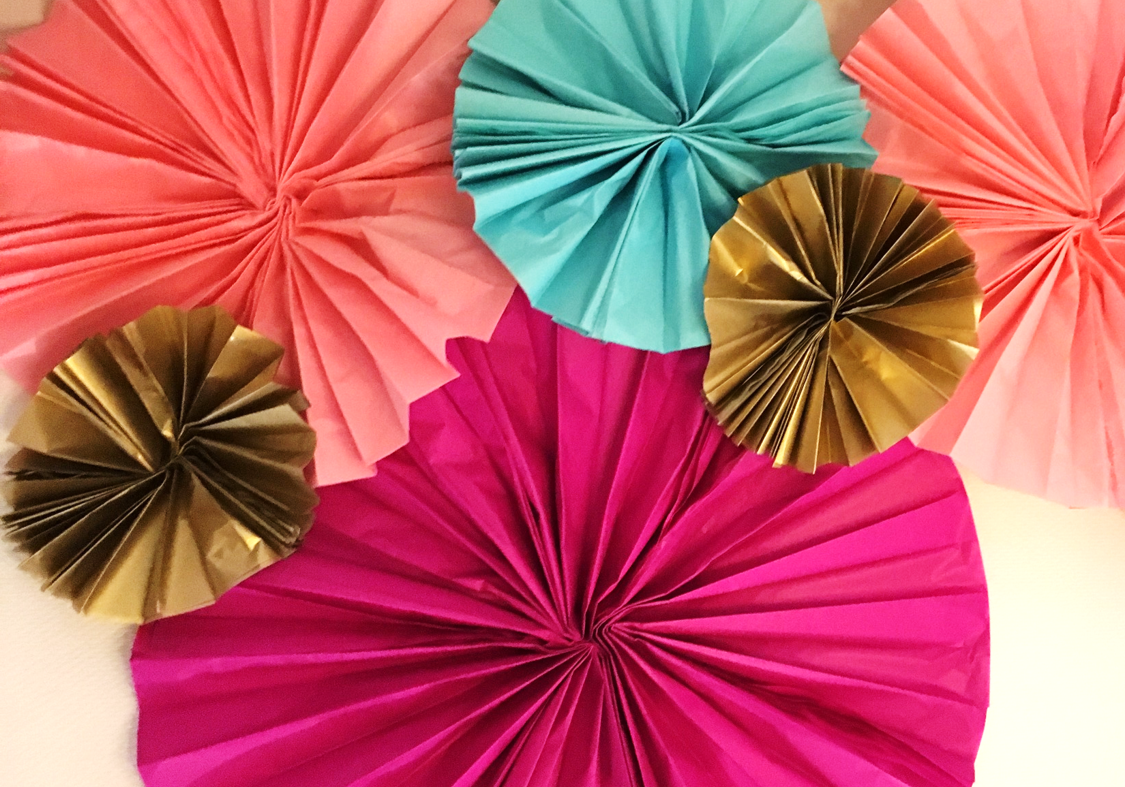
Paper fans can be put together in a single color or a palette of colors, in these case I chose a palette of fuchsia, blue, pink and gold. Below are the instructions step by step on how to create a medium size paper fan, if you want to learn how to create a Large Tissue Paper Fan click here. Enjoy!
Materials:
1 pack of tissue paper of the color of your choice
1 glue stick
1 pair of scissors
Directions:
1. Take 4 sheets of paper together and extend them in a flat surface with the short side facing you.
2. Start folding the 4 sheets of paper making layers of approximately 5 cm in an accordion style as seen on the picture.
3. Once you finish folding, compress all the layers together into one piece
4. Fold the folded paper in half as seen on the picture
5. Make a cut at the middle of the paper, where you marked the half before.
6. Now you should have two pieces of folded tissue paper of same size
7. Fold the two pieces in half
8. Glue the two halves together adding some glue on the first and last layer.
9. Once he two pieces are glued together compress them into one piece.
10. You have now half of the paper fan, to create the second half repeat all the steps one more time.
Once you finish the paper fans should look like on the picture below:
 In this tutorial you will learn how to create tissue paper fans in 10 steps. Paper fans are a very easy way to decorate your special events, you can choose use them as backdrops for photo booths and dessert tables or hang them from the ceiling.
Paper fans can be put together in a single color or a palette of colors, in these case I chose a palette of fuchsia, blue, pink and gold. Below are the instructions step by step on how to create a medium size paper fan, if you want to learn how to create a Large Tissue Paper Fan click here. Enjoy!
Materials:
1 pack of tissue paper of the color of your choice
1 glue stick
1 pair of scissors
In this tutorial you will learn how to create tissue paper fans in 10 steps. Paper fans are a very easy way to decorate your special events, you can choose use them as backdrops for photo booths and dessert tables or hang them from the ceiling.
Paper fans can be put together in a single color or a palette of colors, in these case I chose a palette of fuchsia, blue, pink and gold. Below are the instructions step by step on how to create a medium size paper fan, if you want to learn how to create a Large Tissue Paper Fan click here. Enjoy!
Materials:
1 pack of tissue paper of the color of your choice
1 glue stick
1 pair of scissors
 Directions:
1. Take 4 sheets of paper together and extend them in a flat surface with the short side facing you.
Directions:
1. Take 4 sheets of paper together and extend them in a flat surface with the short side facing you.
 2. Start folding the 4 sheets of paper making layers of approximately 5 cm in an accordion style as seen on the picture.
 3. Once you finish folding, compress all the layers together into one piece
 4. Fold the folded paper in half as seen on the picture
 5. Make a cut at the middle of the paper, where you marked the half before.
 6. Now you should have two pieces of folded tissue paper of same size
 7. Fold the two pieces in half
 8. Glue the two halves together adding some glue on the first and last layer.
 9. Once he two pieces are glued together compress them into one piece.
 10. You have now half of the paper fan, to create the second half repeat all the steps one more time.

 Once you finish the paper fans should look like on the picture below: